Tuesday, April 30, 2013

Crazy for coffee!


Hi everyone, Glenda here with a new prompt from the A Year in the Life of an Art Journal blog! The prompt today is:

PROMPT: Must HAVE IT? Take it, or LEAVE IT? Are you a MUST HAVE MY COFFEE kind of person, or an "I am able to start my day with it or not" kind of person?
SHOOTERS: Take a picture of your coffee near a visual indication of your time line. (calendar, clock, newspaper, lunch)
BOOKERS: Create a page using "all or nothing" in your embellishments and/or texture. http://pinterest.com/pin/1055599884603104/

If you enjoy art journaling or even just taking pictures (you can be a "shooter"!) I hope you pop on over and play along with us!

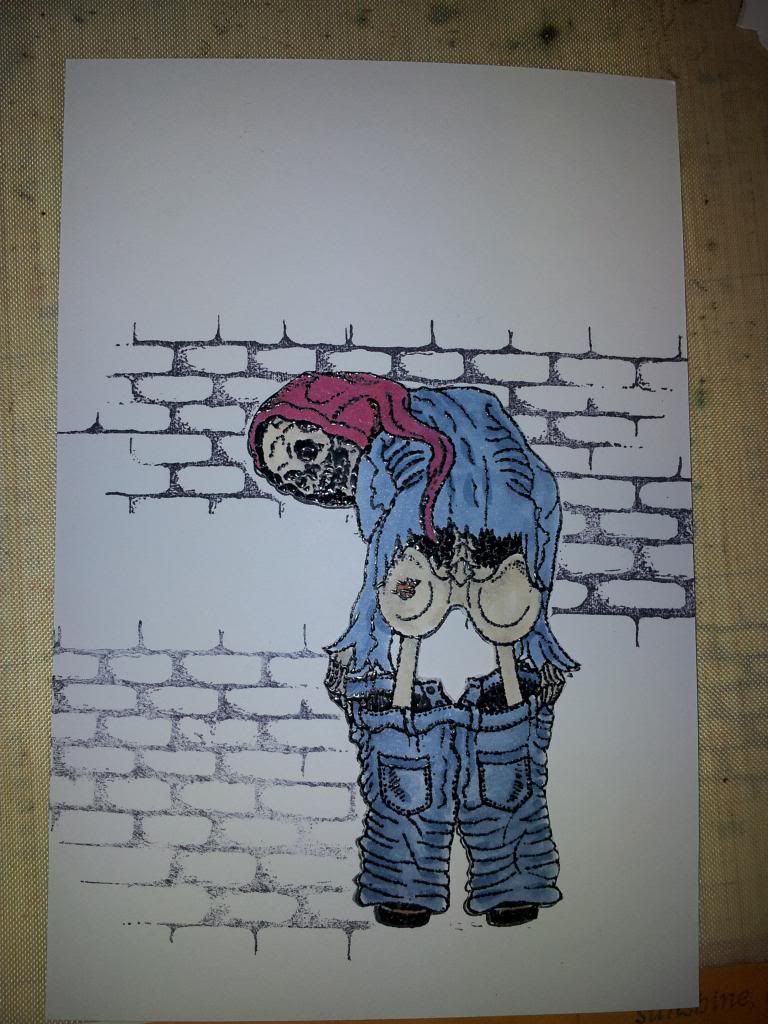
I am a "booker" which means that I love to art journal and for the above prompt I had fun using a bunch different stamps such as the always awesome Line of Chevrons stamp
and the 6 hexagon background  stamp

the row of stars stamp

the chicken wire stamp

the Nun with hands up stamp

the Large lightbulb stamp

and last but not least the Coffee stamp

and I combined all of these plus a ton of strips of washi tape to make this art journal page about coffee!

This page was super fun to make and it makes me smile when I look at it! I hope to see you come on over and play along with us as I would love to see your take on our prompt!

Supplies:

Coffee stamp
Large lightbulb stamp
Nun with hands up stamp
Chicken wire stamp
Row of stars stamp
6 hexagon background stamp
Line of chevrons stamp
Miracle tape
Staedtler watercolor pencils
Numerous kinds of washi tape
Versafine and Staz on ink
Clear stickers
Chipboard letters
Rub ons
Journal sticker
Glimmer mists
White paint

Monday, April 29, 2013

My Shutterbug {A layout}

Hi Everyone! :) :) 

I've been really busy networking and spreading the VLVS! love around. One of the ways is by being a contributor to an online magazine called Paper Haus. We've also been regularly taking ads out in Paper Haus -- they focus largely on layouts, cards and tags, but venture out occasionally as well! 


Here is a layout that appeared in the Spring 2013 issue: 


The base of the layout a white corrugated cardboard and a layer of My Mind's Eye paper. There's some gorgeous Gauche Alchemy washi tape at the bottom and the  background is a mix of glimmer mists by Tattered Angels. But what really sets the mood of the layout is the Bellows Camera by VLVS! stamped twice above the photo. It really ties everything together and gives the layout a "theme". It's been stamped in an archival black ink so that the mists and splatters don't make the image bleed. I finished it off with a date a scatter of epoxy brads, floral beads, and e beads. 

Sunday, April 28, 2013

Social Media & Humor For Teens

 Hey there VLVS friends, 
Pinky here today with another fun project using the amazing Viva Las VegaStamps!

I have your typical teen in my house, and he is always
trying to sneak his phone to the table and other places that are off limits. 
Being the incredibly cool mom I am (not even a little) I decided to "nudge" 
him with a little humor and of course my first thought was VLVS!
This stamp plate was PERFECT!
I just added magnetic strips to the back of this and stuck it right on the
fridge and move it to my napkin holder at dinner...subtle hints right?
Yep...I am kicking butt! 
  1. Trim patterned paper to desired size (I used 5X5).
  2. Layer papers using Miracle Tape. 
  3. Take October Afternoon label sticker. Sticker to spare piece of paper. 
  4. Stamp Aghast Lady VLVS onto sticker- overlapping edge. 
  5. Using white cardstock- stamp VLVS- I Was In My Kitchen image onto cardstock. 
  6. Trim out sentiment. 
  7. Layer all alphas and images onto paper as shown using Miracle Tape and foam pop dots. 
  8. Adhere Magnetic strips to back.
  9. Sit back and admire you amazing parenting skills!
That's it for me today! Until next time- keep on creating and remember
to have fun with it, you only have one life...enjoy it!


Products Used:

Pink Paislee paper
October Afternoon Label Stickers
ColorBox inks
Magnetic Strips
Foam pop dots

Saturday, April 27, 2013

The FDA Crime Scene

It's funny, but I am making a statement about the FDA!  We need to read labels and take care of ourselves because our government won't.

This started with soda pop made with "Brominaded Vegetable Oil."  Brominade use to be used as fire retartant for children's PJ's.  Orange pop, grapefruit type like Fresca - Squirt, and even sports drinks like Gatorade have this in it!  I don't drink pop often, but was on my hubby like a hawk as I read labels to stop him from drinking those chemicals.  My 19 year old stopped drinking pop over 8 months just to be healthy - hmmm he must of felt something about pop.

VLVS Images:
19139 - Bullet Hole
19131 - Chain Link (My Design)
19133- Crime Scene Tape
19140 - Jagged Link Fence
19135- Man in Gas Mask
18961 - Blood Dripping
19077 - Brick Background


This collaged, stamped, altered book page, showcases some of DeeDee's new Apocalypse images.  These images work well with many other images released the past few months.  The chains are an image I designed, perfect for this! 

The page was painted and let dry.  Plastic (Or wax paper) was put behind the page to keep it from sticking to the next page.  Many times, several pages are glued together first to add more structure to the surface, but with the acrylic paint, this was not done. 

The background was stamped with the bricks, then the collage image collaged onto the surface (Yay, Rolling Stone Magazine).  More paint and brick stamping.  The dripping blood was stamping in red ink, then I painted over it to give dimension.

On white cardstock, the gas mask guy, was stamped then masked.  Masking can be done with maskoid for watercolor, low tack frisket film, or Post-It Note.  The fence was stamped over the masked image, then the mask was removed. 

The chains, crime scene tape, and words were stamped and cut out.  These were collaged to the page.  Yellow was added to the banner to imitate real CSI tape.  Also yellow on the words.  This was to make them P-O-P!

I adore the bullet hole!!!  I stamped that directly on the page.  White paint was added here and there to make the black of the bullet hole stand out.  Inks applied as well  around the gas mask image.

Note: That sucker is part of the magazine image.


The FDA is a crime!  And that's my view.  Now back to our regular lives.

Cre8tiveLea Yours - Lea

Friday, April 26, 2013

Our April Guest Desinger.... WILLY!!!

I apologize for the Blogger nonsense earlier.. 

I thought it only right to introduce Willy in a brand new blog post!!

We're so excited to have her humor today!!
 
 "Hi there,
My name is Willy de Bruijne and I live in the east of the Netherlands. Since a copple of years totally hooked on rubberstamping, paper and mixed media. Just often missing free time...

Willy has brought us this card today :


Here is a how to on building this funny from Willy:

1) Stamp the Mooning Skeleton item 18810 with distress ink and emboss it with black powder.
 
2) Make a mask
 
3) Stamp the Brick Background item 19077 2 times
 
4) remove the mask
 
5) Color the Skeleton with copic markers and color the background with distress ink. Finish with My mind says stamp 18773.
 
I love the how to and the use of the masking on this piece.. Thanks so much for stopping by Willy!!!
 

April Guest Designer - WILLY!!

Whoops! I have no idea why the files aren't here... I'll get them up as soon as I get into the office, today!

Thursday, April 25, 2013

100% NL

Hi, Hermine here. This time I made a layout to show my roots :o)


I started by taking a piece of grey board (the size of a scrapbook sheet) and gave it a white wash with gesso. With Stazon Black I stamped Windmill Scene (19124) and the film Strip (18921) with Distress ink Old Paper

 
then I cut out the alarmclock with an alteration die and put some non permanent tape at the back to hold the parts together. Stamped the Windmill on the front (forgot to take a photo).

 
Put the inner piece aside and sponge the outer side with Distress ink Old Paper. Then give it a coat of Versmark using the ink pad direct to paper and emboss with Ultra High Gloss Clear.


Place temporary over the image on the background to see if it looks oke.

 
Use versamark and Ultra High Gloss Clear for the clock hands.

 
Take a piece of twistel and cut into smaller parts. One large one and 6 smaller ones. Opebn the twistel on parts of the string so they look like leaves. On 2 ends I used a little cotton ball.

 
Here nothing is glued on yet, but this way you can figure out what layout you want and if you need to add more.

 
Here are some details of the things I wanted to add to the layout. I used white washi tape and stamped Washi Grid Background (19074) on with Stazon. Did the same with the Washi Lines Background (19073) with M'xed Media Inx. I found these tiny little wooden shoes, gave them a white wash with gesso, sponged a little with Adirondack Mushroom and stamped on them with Adirondack Mushroom using the Swirl (17401). I cut out two butterflies with an alteration die and stamped the Swirl (17401) with Distress Old Paper. Stamped the Girls with Umbrella facing away (19127) wiht Stazon and sponge with Distress ink Old Paper. Then put Versamark on the umbrella abnd embossed with Ultra High Gloss Clear.
Now you can glue all parts on the layout. See photo 1 for the finished result.

Used stamps:
Windmill Scene 19124 also on plate 923
Film Strip 18921
Washi Grid Background 19074 also on plate 917
Girl with Umbrella facing away 19127 also on plate 923
Swirl 17401 also on plate 1333
Washi Lines Background 19073 also on plate 917


Stazon Black
Ultra High Gloss Clear

Wednesday, April 24, 2013

Puddle Stomper


 First sight of Plate 923 = instant rain love!  Can't help it - I live in a rainforest in Southeast Alaska.


Today was one of our rare, sunny days.  So I took advantage of the day to set up a paint station on the front porch. Much of the day was spent with acrylic paints and my new Gelli Plate.  Tag was colored using a variety of acrylic paints:  dark blue, lime green, red, a bit of white, and a bit of orange.  The red was a giveaway for the umbrella coloring.  A bit of glue, a handful of beads and I'm ready for our next day of rain! :)

Monday, April 22, 2013

Upcycling Packing Tape Spools and Celebrating Earth Day


Welcome to Viva Las VegaStamps! and Happy Earth Day! Today we are proudly participating in LeslieRahye's Second Annual EARTH DAY Bloghop. Susan here to bring you my regularly scheduled "INKY" inspiration - with a RECYCLING twist for Earth Day! What do you do with the cardboard core from clear packing tape??? Stamp, ink and alter them and turn them into a fashion statement of course!!!


I've made a CHIC artistic bangle out of a recycled cardboard packing tape spool that I have collaged with hand-stamped paper misted with an iridescent shimmer mist, then adhered and sealed using Sakura 3D Crystal Lacquer. The feature of my bangle is a fortune that I saved from a fortune cookie and a couple other stamps to create a decorative texture.

I cut a section away from the tube and cut the edges rounded.
I sanded the edges with an emery board.


On a strip of scrap patterned paper, I stamped I used Viva Las Vegastamps! patent stamp #1687 with waterproof royal blue ink.


I misted paper lightly with water to moisten.


Gently crumple the paper to break up fibers to that it is not so stiff - AND - it will give a nice suede texture.


I also misted with some bronze and also an iridescent mist to add extra shimmer and to bring out detail of distressed paper. I set aside to dry. 


I painted base layer of antique gold acrylic paint to the bangle.


Completed painted cardboard bangle - which looks lovely just like this! But this is just a starting off point...I want to make it more "ME". So I'm going to make it all painted and inky, too! 


Now I adhere the stamped and painted paper I prepared in the beginning. I cut lines into the paper around the rounded sides to get a smooth wrap-around. I mounted my fortune to a rectangle of chipboard and adhered to bangle with Sakura 3D Crystal Lacquer


I finished off by painting entire bangle in a nice coat of Crystal Lacquer and stamped punched and mounted a couple of accent detail stamps; "Leaf Background #4366" and "Tribal Mask #15962"


My "Art-cycled" CHIC Bangle


My bangle is all artsy and recycled! It looks lovely...and is the perfect home for my GOOD FORTUNE "You feed your body every day. You must also feed your mind".


Thanks so much for dropping by. HAVE YOU HEARD??? Receive FREE SHIPPING now on your order at the Viva Las Vegastamps! store by using the coupon code "FREESHIPPING". If you would like to see more of my creations please visit my blog, sbartist : painting in the dark HERE.

Please scroll down to click on the squares below to continue to all the fantastic artists on the hop...and remember, please Think GREEN! Sb


Sunday, April 21, 2013

Framed Easel Card


Today, I'll share a framed easel card I made for my sister using some of those adorable images from plate #1401.

I used Wheeley Rabbit #18377, Flower Background #18369 and  Hello World #18372.

1. Flower background was stamped with archival black ink, heat set and then colored with distress markers.
2. Antique linen distress ink was applied over the background image with a foam applicator before setting aside to dry.
3. Die cut one scallop frame with sticky back canvas. Die cut one scallop frame with chipboard. Peel off tape backing on canvas, adhere to scallop frame.
4 Die cut scallop back frame with chipboard. Set aside.
5. Paint canvas with dabber acrylic paint, set aside to dry.
6. Adhere Miracle Tape to back of frame and then adhere flower background. Set aside.


7. Wheeley rabbit was inked with Memento black ink, colored with distress markers, cut out and then applied to frame with 3D foam squares on background and Miracle tape on canvas.
8. Hello World was inked, cutout and applied to background with 3 D foam squares.
9. May Arts ribbon was applied before adhering the back of framed piece. Sandwich canvas scalloped frame, flower background and back of frame with Miracle Sheet. 
If you have the easel die cut and then add to back of frame to finish. 
Finished piece: 4 1/4” x 6.”


VLVS Stamps and supplies 


REMEMBER FREE SHIPPING UNTIL APRIL 25, 2013
Enter coupon code "FREESHIPPING"
in your cart when ordering!


Other supplies:
May Arts
Distress ink
Raw canvas
3D foam squares
Sizzix frame die
Sizzix easel die
Scissors
Sizzix Vagabond tool


Thanks for stopping by while I share with you another project using